Dog Behavioral Training DEEP DIVE #1
Sit-Stay & Down-Stay
Welcome to the first piece in a new series of Dog Gone Smarter LLC training articles, each a deep dive into a foundational dog training exercise. Each dog training exercise will help you to build a healthier emotional state and establish a better understanding and relationship with your dog.
Each article in the series will detail a behavioral exercise, important variations to the exercise, how to respond to misbehaviors from your dog during the training, and much more.
Sit-stay training will help your pup to learn to relax and be patient, control her impulses and remain still, relaxed and alert in order to obtain a reward. Our modified method of Sit-stay training is always integrated with affectionate play, which provides additional reinforcement, reward, and balance to the training.
Key Tenets
- Training should be fun and upbeat
- Avoid punitive corrections
- Do not force, dominate, or coerce
- No stern voices, expressions, sounds or dominant body postures
Key Benefits
- Improves a dog’s overall cooperation and compliance
- Improves a dog’s ability to maintain safety
- Improves a dog’s impulse control
- Provides a foundational behavior that helps obtain and maintain your dog’s attention and deference
- Success improves owner confidence in training methodology and personal ability
- Success devalues and reduces likelihood of punitive-based training being employed
- Supports further training by enabling attentive, calm deference thru sitting and staying still

Step 1: Evoking an Orienting Response
The first step is to get your dog’s attention without commanding him. If your dog already comes when called, be sure the recall / verbal signal “Come,” is not spoken as a command.
Before you move onto Step #2, ensure that you are able to recall your dog reliably, without commanding him. When you recall him, speak the verbal signal “Come,” as you would to invite your dog over for playtime.
If your dog comes when playfully called as described above, proceed to Step 2. Otherwise repeat Step 1.
Avoid repeating the verbal request “Come,” more than twice. Instead, if your pup fails to effectively respond after the first verbal request, try using a squeaker ball (ideally held in your fourth and fifth finger) with a treat held in your other fingers. Be a little more animated and enticing with your invitation.
Add a Hand Signal: Squeak the ball, then sweep your right hand out towards your dog – almost scooping them up in front of your visual field – and draw your hand inwards towards your chest while repeating (for the second time) in a friendly and slightly upbeat excited manner, the signal word “Come.”
After the signal word, simply close your hand around the treats (and ball if practical) and show a closed back hand near the floor inline with where your dog would likely approach.
If after this second attempt your pup still fails to come to you, say the signal words “Oh well,” and turn away from your dog for a TO (time out) of about 15 seconds. After the 15-sec TO, repeat the training again.
Additional Consideration
When you squeak the ball and sweep your hand forward speaking the word “Come,” watch carefully for any body language or behavior that indicates your dog is aware of the request and considering compliance. This behavior might be simply a head turn at first, Then perhaps a slow walk in your direction.
As soon as you see this compliant behavior, mark it with the bridge word “Good” and promptly deliver a treat reward. You may want to start the exercise nearby your dog for these first few attempts. Look for ways to garner a quick success without violating training tenets.
Another training aid can be odor. T ry adding a few drops of natural orange essence (with or without lemon essence, depending on your dog’s attraction) to the inside of a squeaker ball toy. This will help to establish a link between the ball, sound, hand gesture, odor, and the food reward.
Additionally, you can use a clicker to more precisely mark the moment your dog begins to comply with your recall attempt. The immediacy of the clicker sounds, can be helpful in shaping behavior. The clicker acts as an audible bridge orienting your dog to the correct behavior to obtain the reward.
Before moving on to Step 2, you should be able to do the following three things as described:
- Recall your dog with only the verbal signal “Come,”
- Recall your dog with only the hand signal
- Recall your dog with only your closed hand

Step 2: Obtaining Your First Sit
Recall your pup (closed hand, verbal, or hand gesture) and immediately upon arrival, encourage your dog to sit by raising your closed hand from Step 1 up and behind your dog’s head, causing your dog to follow your hand up and into a sit.
As soon as the sit is achieved, say the bridge word “Good” – timed to coincide with the earliest moment the dog begins sitting. Notice that you are not being instructed to use the word “Sit.” This is intentional. Only use the gestures described to obtain your dog’s initial sit(s).
After the first couple of successes, change your hand position to the hand signal for sitting. This hand signal for Sit is and open palm facing upward and fingers towards your dog, raised in the manner that would imitate the motion of raising your pup’s chin up into a sitting position. (Of course, do not attempt to actually raise your dog’s chin.)

Continue training as above, recalling your pup – ideally with only a hand gesture – and then continuing the request into a Sit hand gesture upon your dog’s arrival. Only once your dog reliably Comes and Sits to your hand gestures alone, should you teach your dog the accompanying verbal signal, “Sit” by pairing it with the hand gesture.
As with all verbal signals, do not use it more than twice in succession without success. In fact, randomize whether it will be used once or twice before changing tactics, so as to slow any anticipation / inappropriate adaptation from your dog. After one to two verbal attempts, return to the hand signal with treat – to lure your dog into position.
Step 3: Balance Your Recall
Continue the training as described above, until your dog reliably comes and sits equally well to a hand gesture or to a vocal signal.
Be sure to keep the training fun and spirited. Feel free to bring out your creatively in your training exercises. Deliver pleasant sounds, expressions and behaviors that capture your dog’s wondering interest.
Training sessions may last 5 minutes or 45 minutes. That largely depends on you and your dog’s attention span.
After each training session, release your dog with the verbal signal “Release.” Once Released, stand up, turn away and overtly end your connection to the training, and your attention to your dog. Walk a small distance away, turning your rear end towards your dog (a message to your dog you are done). Maintain this disconnection for at least 15 seconds before making any connection again.
Step 4: Multipliers
In this step we start to add Multipliers. Three principal Multipliers used in dog training are: Distance, Duration, and Distraction – all used with increasing levels of difficulty.
Distance is the first Multiplier We introduce
Again, only after a high degree of reliability has been achieved with the exercise, add the Multiplier: Distance with the following technique.
Add The Hand Signal for Stay
With your dog looking up and towards your direction, present your hand, palm-side towards your dog. While verbally rewarding your dog – as it continues to remain in place – step away and quickly return and present a food reward with the verbal signal “Good.”
Soon after, release the dog with the verbal signal “Release.”
Step 5: Add the verbal signal, “Stay.”
After repeating Step 4 and achieving reliability, begin to pair the hand signal with the verbal signal, “Stay” – WHILE also taking two short steps away from your dog. After these short steps, return quickly to reward and release.
Repeat this step several times with variable durations without releasing your dog. Vary your duration, ending with the longest duration of the session and then a reward and release and play.
Note: If at any time your dog’s behavior breaks down, consider reverting to the previous step.
Step 6: Add Multiplier: Duration
Obtain reliable Sit-stay durations and distances over several attempts and over several sessions. Increase your Sit-stay durations as your dog shows aptitude. Vary the Sit-stay duration a bit within each session, but always end with the longest duration of the session.
For example: Set the Sit-stay duration first to 15-sec, then 20-sec, then 10-sec, and then 30 sec.
Step 7: Interrupt with Play Activities
THIS IS VERY IMPORTANT. Vary the time you spend in Steps 1 – 6, so as to include Step 7 based upon your dog’s needs and willingness to participate. The goal is to periodically interrupt the training session with some fun ball play or other favorite activity.
Note: If your dog continually breaks from the training session or begins barking without being released, initiate a 30-second TO. If additional poor behavior is presented, tether your dog during the training and play sessions. The tether will allow you to walk outside your dog’s “sphere of influence” so that you may ignore your dog during the TO.
In addition to barking, you should also break from training at the first sign of behaviors such as jumping-up, barking, mouthing, zoomies, etc.
Step 8: Change Your Location, Focus on Your Side
Vary the location of your Sit-stay training to different areas of the home. Once you have achieved a high degree of repeatability and predictability over duration and distance Multipliers with Sit-stay, it’s time to add Distraction.
Sit-stay training should be performed with either your dog facing you or with your dog sitting to your left side. With time, focus more training with your dog performing Sit-stay on the left side of your body while you face forward. Gradually preferring your dog’s Sit-stay be performed to your left side will help to reinforce emotional deference and aid in Healed Leash training later on.
Step 9: Add the Distraction Multiplier
Continue the Sit-stay training outside the home in a variety of locations, including the frontyard, backyard, various parks, sidewalks, and even near a neighborhood barking dog). Be creative. Be safe.
In the case of highly disruptive behavior (from your dog), use a tether to secure your dog and walk outside the room where he is located.
While outside the room your dog is secured in and barking – provide a 30-sec TO. The 30-sec TO only begins when the dog has not barked (or exhibited extreme disruptive behavior) for at least 10 seconds. Resume training.
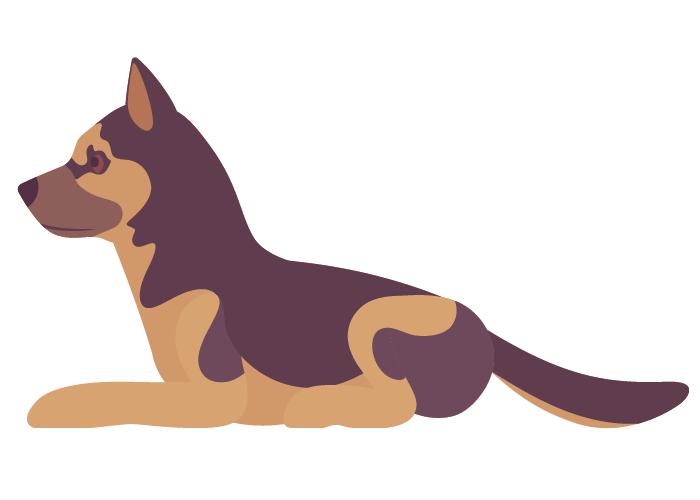
Step 10: Repeat Pattern with Down-stay training.
Repeat the above pattern with your dog laying down and staying, in a Down-stay. Unlike the Sit-stay, the Down-stay is trained (almost) exclusively to occur on the left side of your body.
Use your hand and treat motions, to lure and shape your dog into a down position.
Step 11: Attention-cuing into Down-stay (Optional)
Aside from hand gestures and treat motions, the following attention-cuing procedure can be used to put your dog into a Down position.
Step 11a: Make eye contact
Make eye contact with your dog and then immediately glance down at a fixed point directly in front of your dog – and tap over the spot two times.
Step 11b: If your dog refuses
If your dog refuses to lie down, briefly re-establish eye contact, then glance back at the same spot and repeat the two taps.
Step 11c: As soon as your dog begins to lie down
As soon as your dog begins to lie down, offer the bridge word “Good,” followed by a reward. Repeat.
Goals of Sit-stay and Down-stay
A key goal of Sit-stay and Down-stay training is the ability of the owner to establish control over their dog, with a strictly 100% reward-based training technique. This training will also both help to devalue ineffective punitive based training methods that might possibly have been employed by the owner in the past, with this much more sustainable and effective reward-based training methodology.
In addition, this training exercise will also foster in your dog, secondary emotional associations with the training process. The physical act of sitting and staying will now be affirmatively paired with the feelings of enhanced reward, comfort, safety, and relaxation.
Authored by,
Erik Muenker BADC RPDT
Dog Behaviorist
Owner, Dog Gone Smarter LLC